This Is How: ‘Mallet Time’ by Matt Badenoch
Really great to have the fab Matt Badenoch on the site today, as he talks us through his thought process and just how he captured this great image. This is a really interesting and exhaustive piece, with so many nuggets of sage advice and tips – including tips on backgrounds, composition, patience and more…thanks so much, Matt!
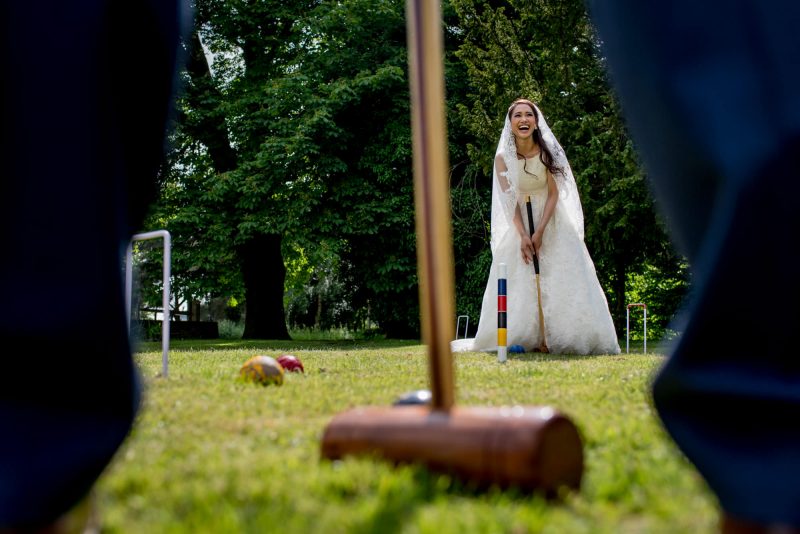
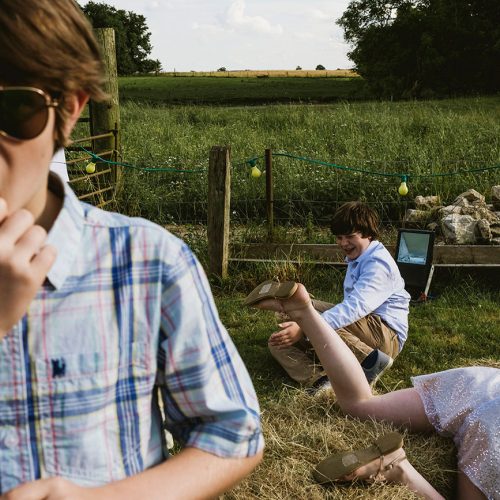
This photo was taken of Michelle (the bride) playing croquet with her husband Dan during their reception. To create this photo I used a thought process I now use regularly at my weddings. A process that has been built on over the years thanks to some incredible teachers I’ve been lucky enough to learn from at workshops and conferences. I hope you find it helpful.
1. BACKGROUND FIRST
As my subject (the bride) was playing croquet I knew she’d be moving around the pitch (no idea what you call the area you play croquet on so I’m going with pitch). The game was probably going to take a few minutes so I had some time.
At a workshop a couple of years back, US Documentary wedding photographer Tyler Wirken taught me the importance of the background in photos. How a clean background can make or break a photo. When we take a photo, we do it for a reason: to tell a story. A messy background can be a huge distraction to said story, while a clean background helps the viewer see the story straight away without effort; creating greater impact.
So I looked around and though what would make the perfect background?
The area surrounding the croquet pitch was pretty messy. There was a house with bright white walls on two sides and one side low bushes, some telephone poles and the bright sky behind. On the final side there was some large trees who’s foliage provided a fairly clean background which was darker than my subject. I now had my background.
2. COMPOSITION CAN ALWAYS BE IMPROVED – FIND FOREGROUND INTEREST
Another thing I’ve learnt, is that compostion can always be improved. So even though you think you’ve gotten your composition, don’t stop there. Keep looking. Is there a better angle you can find, an element you can remove that’s distracting, or an element you can include to add more context and show a bigger story.
Using foreground is a great way to remove distractions and tell more of the story. The key is picking something that is relevant to the story.
I took a few frames of Michelle which I liked and then I thought about what else I could add. I felt that what was missing from this photo was the person she was playing a guest – her husband Dan. So I started playing with the composition while still keeping an eye on my background. I settled with a frame where I was shooting between Dan’s legs which also allowed me to include his mallet and keep my background clean.
3. CHECK THE EDGES OF YOUR FRAME
I’m not sure why, but looking back at when I first started shooting, I never seemed to give much care to the Edges of my frame. All my attention was what was going on in the middle or a rule of thirds hotspot. If the edges of my frame were clean it was mere luck.
But when someone looks at your photo, they’re looking at the entire thing. Edges and all. If there’s a distracting element at the edge of the photo, it’s going to draw their eye away from the subject and story you’re trying to tell.
Now I always keep an eye on the edges of my frame and it makes such a difference!
For this lesson, a shout out to Chicago based wedding photographer Candice Cusic.
4. COMPOSE AND WAIT
The final lesson comes from the great American documentary photographer Sam Abell. If you chase your subject it’s very difficult to balance the position of the background, foreground and subject at the same time. If you first compose your background and wait, you’ll be surprised how often the subject falls perfectly into place. I use this technique a lot when shooting street photography. There’s a great documentary on Youtube if you want to learn from the master (Sam Abell) himself.
The other side of this is the Moment Curve. The idea of the moment curve is that for every moment there is a climax point (the top of the curve) at which the moment is at its strongest. The moment will continue to grow until it hits the climax and then it fades. When we see a moment at a wedding and start photographing it, it’s impossible to tell at which part of the curve it’s at. So once you’ve captured the moment you were after, don’t stop, keep shooting through the moment. Even if you think the climax point has passed, keep shooting until the moment has stopped. So many of my favourite photos are thanks to this approach.
In this example, I had a great action photo of Michelle hitting a ball with all the framing lined up. But I knew there might be more so I kept shooting. It was during the next shot that she swung, missed the ball, looked up at Dan and burst into laughter. And that was the winning photo.
At a wedding you’ll have to balance and prioritise how long you can wait for a specific moment. But if the moment is worth it, I’d challenge you to wait just that little be longer than you usually would. You’d be amazed at what can happen.
And there you have it. Thanks to all the photographers (some mentioned above, but many who weren’t) who’s teachings contributed to me capturing this photo and many of my other favourites!
See more of Matt’s work on his website, and here on his TiR profile.
We have lots more wedding photography tips by our worldwide community of fantastic photographers, too.
Would you like to join us? Members receive a whole host of benefits, including 18 Story Award entries and 60 Reportage Award entries per year, all included in our membership fee. Our five judges (who change for each Collection) are currently poring over our thousands of submissions for Collection Eight, but you can still join now and be ready for when Collection Nine is open to entries, which will be next week.
